

The Government of Goa on Thursday announced the signing of a Memorandum of Understanding (MoU) with Elon Musk-led Starlink Satellite Communications to strengthen digital infrastructure and connectivity across the state. Starlink’s partnership with the Department of Information Technology, Electronics & Communications (DITE&C) aims to explore advanced connectivity solutions to support digital inclusion, public infrastructure, coastal safety, and emergency response capabilities across the state. “The Government of Goa is committed to harnessing technology to drive digital transformation and improve the lives of our citizens. This partnership with Starlink is a significant step towards achieving our vision of a digitally empowered Goa,” Goa Chief Minister Dr Pramod Sawant said in a statement. Add Zee News as a Preferred Source “This partnership with Starlink will transform Goa’s governance landscape, leveraging modern technology to drive efficiency and responsiveness. By bridging the digital divide and enhancing public services, we will make Goa an even more attractive hub for investment, tourism, and talent, while ensuring our citizens reap the benefits of digital progress,” added Rohan Khaunte, Minister for ITE&C. Under the MoU, DITE&C and Starlink will explore opportunities for collaboration in key areas, including digital connectivity, disaster resilience, and smart governance in Goa. Starlink Satellite Communications Private Limited, the Indian entity for SpaceX’s Starlink satellite internet services, has expressed interest in piloting initiatives related to connectivity solutions. These include providing satellite broadband connectivity to select locations with limited terrestrial networks, such as government schools, healthcare facilities, and disaster management centres. The company will also enhance emergency preparedness, build capacity through training, and explore affordable tariff structures for socially beneficial use cases. Additionally, it will support smart governance, tourism, and coastal development by providing connectivity solutions for public infrastructure and services. Through this partnership, the Government of Goa reaffirmed its dedication to digital transformation by leveraging technology to drive innovation, economic prosperity, and citizen welfare, and by building a resilient digital ecosystem for a sustainable future. Starlink India is yet to start its satellite services in the country. The satellite-based internet service is expected to be available for Rs 8,600 per month, while new subscribers will need to purchase a hardware kit priced at Rs 34,000.

A Gentle Introduction to Language Model Fine-tuning
import dataclasses import tokenizers import torch import torch.nn as nn import torch.nn.functional as F from torch import Tensor # Model architecture same as training script @dataclasses.dataclass class LlamaConfig: “”“Define Llama model hyperparameters.”“” vocab_size: int = 50000 max_position_embeddings: int = 2048 hidden_size: int = 768 intermediate_size: int = 4*768 num_hidden_layers: int = 12 num_attention_heads: int = 12 num_key_value_heads: int = 3 class RotaryPositionEncoding(nn.Module): “”“Rotary position encoding.”“” def __init__(self, dim: int, max_position_embeddings: int) -> None: super().__init__() self.dim = dim self.max_position_embeddings = max_position_embeddings N = 10_000.0 inv_freq = 1.0 / (N ** (torch.arange(0, dim, 2) / dim)) inv_freq = torch.cat((inv_freq, inv_freq), dim=–1) position = torch.arange(max_position_embeddings) sinusoid_inp = torch.outer(position, inv_freq) self.register_buffer(“cos”, sinusoid_inp.cos()) self.register_buffer(“sin”, sinusoid_inp.sin()) def forward(self, x: Tensor) -> Tensor: batch_size, seq_len, num_heads, head_dim = x.shape device = x.device dtype = x.dtype cos = self.cos.to(device, dtype)[:seq_len].view(1, seq_len, 1, –1) sin = self.sin.to(device, dtype)[:seq_len].view(1, seq_len, 1, –1) x1, x2 = x.chunk(2, dim=–1) rotated = torch.cat((–x2, x1), dim=–1) return (x * cos) + (rotated * sin) class LlamaAttention(nn.Module): “”“Grouped-query attention with rotary embeddings.”“” def __init__(self, config: LlamaConfig) -> None: super().__init__() self.hidden_size = config.hidden_size self.num_heads = config.num_attention_heads self.head_dim = self.hidden_size // self.num_heads self.num_kv_heads = config.num_key_value_heads assert (self.head_dim * self.num_heads) == self.hidden_size self.q_proj = nn.Linear(self.hidden_size, self.num_heads * self.head_dim, bias=False) self.k_proj = nn.Linear(self.hidden_size, self.num_kv_heads * self.head_dim, bias=False) self.v_proj = nn.Linear(self.hidden_size, self.num_kv_heads * self.head_dim, bias=False) self.o_proj = nn.Linear(self.num_heads * self.head_dim, self.hidden_size, bias=False) def forward(self, hidden_states: Tensor, rope: RotaryPositionEncoding) -> Tensor: bs, seq_len, dim = hidden_states.size() query_states = self.q_proj(hidden_states).view(bs, seq_len, self.num_heads, self.head_dim) key_states = self.k_proj(hidden_states).view(bs, seq_len, self.num_kv_heads, self.head_dim) value_states = self.v_proj(hidden_states).view(bs, seq_len, self.num_kv_heads, self.head_dim) attn_output = F.scaled_dot_product_attention( rope(query_states).transpose(1, 2), rope(key_states).transpose(1, 2), value_states.transpose(1, 2), is_causal=True, dropout_p=0.0, enable_gqa=True, ) attn_output = attn_output.transpose(1, 2).reshape(bs, seq_len, self.hidden_size) return self.o_proj(attn_output) class LlamaMLP(nn.Module): “”“Feed-forward network with SwiGLU activation.”“” def __init__(self, config: LlamaConfig) -> None: super().__init__() self.gate_proj = nn.Linear(config.hidden_size, config.intermediate_size, bias=False) self.up_proj = nn.Linear(config.hidden_size, config.intermediate_size, bias=False) self.act_fn = F.silu self.down_proj = nn.Linear(config.intermediate_size, config.hidden_size, bias=False) def forward(self, x: Tensor) -> Tensor: gate = self.act_fn(self.gate_proj(x)) up = self.up_proj(x) return self.down_proj(gate * up) class LlamaDecoderLayer(nn.Module): “”“Single transformer layer for a Llama model.”“” def __init__(self, config: LlamaConfig) -> None: super().__init__() self.input_layernorm = nn.RMSNorm(config.hidden_size, eps=1e–5) self.self_attn = LlamaAttention(config) self.post_attention_layernorm = nn.RMSNorm(config.hidden_size, eps=1e–5) self.mlp = LlamaMLP(config) def forward(self, hidden_states: Tensor, rope: RotaryPositionEncoding) -> Tensor: residual = hidden_states hidden_states = self.input_layernorm(hidden_states) attn_outputs = self.self_attn(hidden_states, rope=rope) hidden_states = attn_outputs + residual residual = hidden_states hidden_states = self.post_attention_layernorm(hidden_states) return self.mlp(hidden_states) + residual class LlamaModel(nn.Module): “”“The full Llama model without any pretraining heads.”“” def __init__(self, config: LlamaConfig) -> None: super().__init__() self.rotary_emb = RotaryPositionEncoding( config.hidden_size // config.num_attention_heads, config.max_position_embeddings, ) self.embed_tokens = nn.Embedding(config.vocab_size, config.hidden_size) self.layers = nn.ModuleList([ LlamaDecoderLayer(config) for _ in range(config.num_hidden_layers) ]) self.norm = nn.RMSNorm(config.hidden_size, eps=1e–5) def forward(self, input_ids: Tensor) -> Tensor: hidden_states = self.embed_tokens(input_ids) for layer in self.layers: hidden_states = layer(hidden_states, rope=self.rotary_emb) return self.norm(hidden_states) class LlamaForPretraining(nn.Module): def __init__(self, config: LlamaConfig) -> None: super().__init__() self.base_model = LlamaModel(config) self.lm_head = nn.Linear(config.hidden_size, config.vocab_size, bias=False) def forward(self, input_ids: Tensor) -> Tensor: hidden_states = self.base_model(input_ids) return self.lm_head(hidden_states) def apply_repetition_penalty(logits: Tensor, tokens: list[int], penalty: float) -> Tensor: “”“Apply repetition penalty to the logits.”“” for tok in tokens: if logits[tok] > 0: logits[tok] /= penalty else: logits[tok] *= penalty return logits @torch.no_grad() def generate(model, tokenizer, prompt, max_tokens=100, temperature=1.0, repetition_penalty=1.0, repetition_penalty_range=10, top_k=50, device=None) -> str: “”“Generate text autoregressively from a prompt. Args: model: The trained LlamaForPretraining model tokenizer: The tokenizer prompt: Input text prompt max_tokens: Maximum number of tokens to generate temperature: Sampling temperature (higher = more random) repetition_penalty: Penalty for repeating tokens repetition_penalty_range: Number of previous tokens to consider for repetition penalty top_k: Only sample from top k most likely tokens device: Device the model is loaded on Returns: Generated text ““” # Turn model to evaluation mode: Norm layer will work differently model.eval() # Get special token IDs bot_id = tokenizer.token_to_id(“[BOT]”) eot_id = tokenizer.token_to_id(“[EOT]”) # Tokenize the prompt into integer tensor prompt_tokens = [bot_id] + tokenizer.encode(” “ + prompt).ids input_ids = torch.tensor([prompt_tokens], dtype=torch.int64, device=device) # Recursively generate tokens generated_tokens = [] for _step in range(max_tokens): # Forward pass through model logits = model(input_ids) # Get logits for the last token next_token_logits = logits[0, –1, :] / temperature # Apply repetition penalty if repetition_penalty != 1.0 and len(generated_tokens) > 0: next_token_logits = apply_repetition_penalty( next_token_logits, generated_tokens[–repetition_penalty_range:], repetition_penalty, ) # Apply top-k filtering if top_k > 0: top_k_logits = torch.topk(next_token_logits, top_k)[0] indices_to_remove = next_token_logits < top_k_logits[–1] next_token_logits[indices_to_remove] = float(“-inf”) # Sample from the filtered distribution probs = F.softmax(next_token_logits, dim=–1) next_token = torch.multinomial(probs, num_samples=1) # Early stop if EOT token is generated if next_token.item() == eot_id: break # Append the new token to input_ids for next iteration input_ids = torch.cat([input_ids, next_token.unsqueeze(0)], dim=1) generated_tokens.append(next_token.item()) # Decode all generated tokens return tokenizer.decode(generated_tokens) checkpoint = “llama_model_final.pth” # saved model checkpoint tokenizer = “bpe_50K.json” # saved tokenizer max_tokens = 100 temperature = 0.9 top_k = 50 penalty = 1.1 penalty_range = 10 # Load tokenizer and model device = torch.device(“cuda” if torch.cuda.is_available() else “cpu”) tokenizer = tokenizers.Tokenizer.from_file(tokenizer) config = LlamaConfig() model = LlamaForPretraining(config).to(device) model.load_state_dict(torch.load(checkpoint, map_location=device)) prompt = “Once upon a time, there was” response = generate( model=model, tokenizer=tokenizer, prompt=prompt, max_tokens=max_tokens, temperature=temperature, top_k=top_k, repetition_penalty=penalty, repetition_penalty_range=penalty_range, device=device, ) print(prompt) print(“-“ * 20) print(response)

Wire vs Wireless mouse: Which is faster and better for work and gaming? Features, Performance and speed compared | Technology News
Wire vs Wireless mouse: In today’s world of computers and laptops, choosing the right mouse may seem like a casual choice, but it can make a big difference in how smoothly you work or play games. Wired and wireless mice are the two main options, and each offers different features. Experts say that both types are good, but the best choice depends on how you plan to use your mouse. A wired mouse connects to your computer with a cable. You plug it into a USB port, and it works right away without any additional setup. Because of this direct link, wired mice offer a steady and reliable connection at all times. On the other hand, a wireless mouse connects through Bluetooth or a small USB receiver plugged into your laptop. This means you don’t need to worry about cables, making it easy to carry and work around. Wireless mice may need to be paired before use and rely on batteries or internal rechargeable power. Add Zee News as a Preferred Source Which is faster? When it comes to speed and performance, wired mice usually have the edge. Because there is no wireless signal involved, data travels instantly from the mouse to the computer. This means lower latency – the tiny delay between moving the mouse and seeing the cursor move on screen. For most everyday tasks, such as browsing or office work, the difference between wired and wireless may be hard to notice. However, for activities like competitive gaming or detailed graphic design, that slight delay can matter. Many wired gaming mice also support very high polling rates, reporting position updates thousands of times per second. Wireless mouse technology has improved a lot in recent years, and high-end models now offer performance close to wired ones. However, wired mice typically still win in terms of raw speed and response. (Also Read: Ubisoft cancelled games: Six titles scrapped, including Prince of Persia: The sands of time remake; fans disappointed) Convenience and features Wireless mice have an edge in flexibility and comfort. Without a cable dragging on the desk, you get a cleaner setup and more freedom to move the mouse around, which is especially useful if you use a laptop or travel often. Wireless models also help reduce desk clutter and feel more modern. Many come with long battery life and can last weeks between charges. However, they do require battery management, and sometimes a lost dongle can be an issue. Wired mice, in contrast, never need charging and usually cost less. Their simple plug-and-use nature makes them dependable for everyday use without extra steps. Which one wins? There is no single best choice for everyone. If you prioritise precision, low latency, and constant performance, a wired mouse is the better option. But if you value mobility, desk tidiness, and convenience, a wireless mouse may suit you better. In short, the choice of mouse depends on how you use your computer or laptop – whether for work, gaming, or everyday tasks. Each type has its place, and both continue to improve with new technology.
Supervised Learning: The Foundation of Predictive Modeling
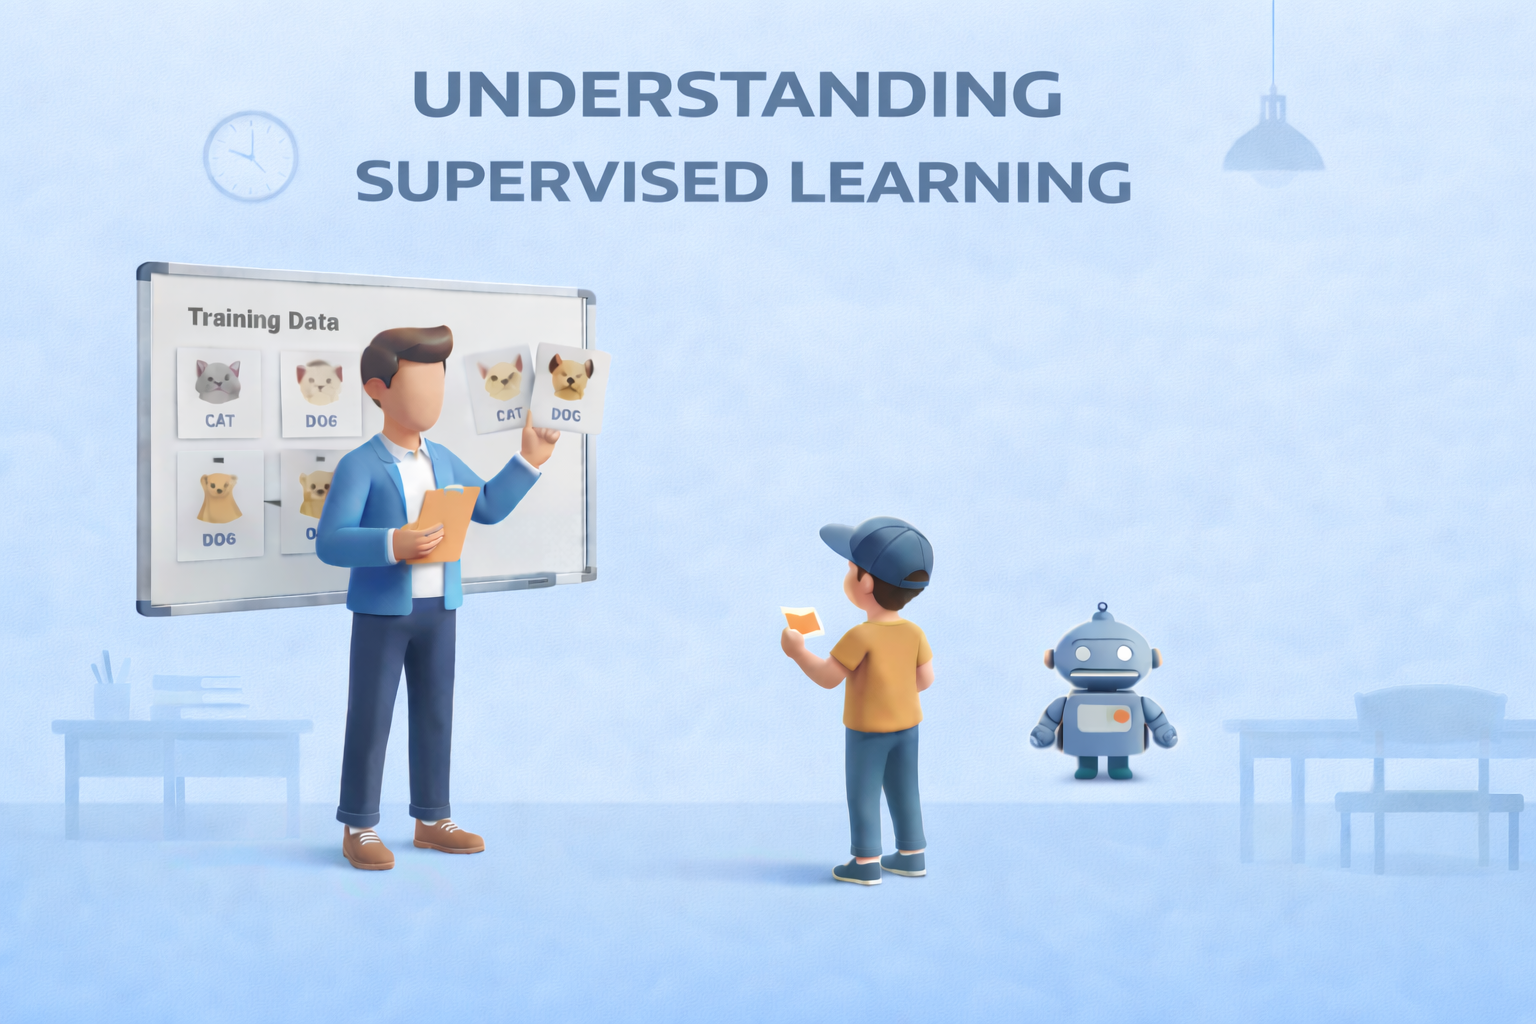
Supervised Learning: The Foundation of Predictive ModelingImage by Author Editor’s note: This article is a part of our series on visualizing the foundations of machine learning. Welcome to the latest entry in our series on visualizing the foundations of machine learning. In this series, we will aim to break down important and often complex technical concepts into intuitive, visual guides to help you master the core principles of the field. This entry focuses on supervised learning, the foundation of predictive modeling. The Foundation of Predictive Modeling Supervised learning is widely regarded as the foundation of predictive modeling in machine learning. But why? At its core, it is a learning paradigm in which a model is trained on labeled data — examples where both the input features and the correct outputs (ground truth) are known. By learning from these labeled examples, the model can make accurate predictions on new, unseen data. A helpful way to understand supervised learning is through the analogy of learning with a teacher. During training, the model is shown examples along with the correct answers, much like a student receiving guidance and correction from an instructor. Each prediction the model makes is compared to the ground truth label, feedback is provided, and adjustments are made to reduce future mistakes. Over time, this guided process helps the model internalize the relationship between inputs and outputs. The objective of supervised learning is to learn a reliable mapping from features to labels. This process revolves around three essential components: First is the training data, which consists of labeled examples and serves as the foundation for learning Second is the learning algorithm, which iteratively adjusts model parameters to minimize prediction error on the training data Finally, the trained model emerges from this process, capable of generalizing what it has learned to make predictions on new data Supervised learning problems generally fall into two major categories: Regression tasks focus on predicting continuous values, such as house prices or temperature readings; Classification tasks, on the other hand, involve predicting discrete categories, such as identifying spam versus non-spam emails or recognizing objects in images. Despite their differences, both rely on the same core principle of learning from labeled examples. Supervised learning plays a central role in many real-world machine learning applications. It typically requires large, high-quality datasets with reliable ground truth labels, and its success depends on how well the trained model can generalize beyond the data it was trained on. When applied effectively, supervised learning enables machines to make accurate, actionable predictions across a wide range of domains. The visualization below provides a concise summary of this information for quick reference. You can download a PDF of the infographic in high resolution here. Supervised Learning: Visualizing the Foundations of Machine Learning (click to enlarge)Image by Author Machine Learning Mastery Resources These are some selected resources for learning more about supervised learning: Supervised and Unsupervised Machine Learning Algorithms – This beginner-level article explains the differences between supervised, unsupervised, and semi-supervised learning, outlining how labeled and unlabeled data are used and highlighting common algorithms for each approach.Key takeaway: Knowing when to use labeled versus unlabeled data is fundamental to choosing the right learning paradigm. Simple Linear Regression Tutorial for Machine Learning – This practical, beginner-friendly tutorial introduces simple linear regression, explaining how a straight-line model is used to describe and predict the relationship between a single input variable and a numerical output.Key takeaway: Simple linear regression models relationships using a line defined by learned coefficients. Linear Regression for Machine Learning – This introductory article provides a broader overview of linear regression, covering how the algorithm works, key assumptions, and how it is applied in real-world machine learning workflows.Key takeaway: Linear regression serves as a core baseline algorithm for numerical prediction tasks. 4 Types of Classification Tasks in Machine Learning – This article explains the four primary types of classification problems — binary, multi-class, multi-label, and imbalanced classification — using clear explanations and practical examples.Key takeaway: Correctly identifying the type of classification problem guides model selection and evaluation strategy. One-vs-Rest and One-vs-One for Multi-Class Classification – This practical tutorial explains how binary classifiers can be extended to multi-class problems using One-vs-Rest and One-vs-One strategies, with guidance on when to use each.Key takeaway: Multi-class problems can be solved by decomposing them into multiple binary classification tasks. Be on the lookout for for additional entries in our series on visualizing the foundations of machine learning. About Matthew Mayo Matthew Mayo (@mattmayo13) holds a master’s degree in computer science and a graduate diploma in data mining. As managing editor of KDnuggets & Statology, and contributing editor at Machine Learning Mastery, Matthew aims to make complex data science concepts accessible. His professional interests include natural language processing, language models, machine learning algorithms, and exploring emerging AI. He is driven by a mission to democratize knowledge in the data science community. Matthew has been coding since he was 6 years old.

WEF 2026: AI won’t replace human jobs, but augment human employees at scale, say experts | Technology News
Artificial intelligence would not replace human jobs but can only reshape work by automating tasks, said leading business executives from technology companies at the ongoing World Economic Forum 2026 in Davos. Kian Katanforoosh, Founder and Chief Executive Officer of Workera, said language matters when describing AI. “Personally, I’m not a fan of calling AI agents or co-workers,” he told a WEF session, arguing that AI excels at tasks but can’t outperform humans at “entire jobs.” Humans, by contrast, perform “hundreds of tasks at times.” “Predictions that AI would wholesale replace jobs have so far been wrong,” he added. Add Zee News as a Preferred Source Munjal Shah, co-founder and CEO of Hippocratic AI, agreed that AI will augment human employees at a massive scale rather than replace them. He forecast a future of “8 billion people and 80 billion AIs,” saying most systems will enable new use cases rather than replacing existing human roles. He pointed to an AI system that called thousands of people during a heatwave, guiding them to cooler locations and offering health advice. Getting it right required rigorous testing. “We have models that check models that check models,” he said. Kate Kallot, Founder and CEO of Amini, said AI firmly remains a “tool” that cannot make value-based decisions. It “can’t choose the best outcomes” because it doesn’t yet have the right inputs, Kallot said. Christoph Schweizer, CEO of BCG, said the experience of working with AI can feel like collaborating with a co-worker. “You are now in a reality where it feels like a co-worker, whether you call it that or not,” he said. Schweizer argued that success depends on how companies change their organizations, not just their tools. “They will succeed if they really change how their people work,” he said. He urged that AI be treated as “a CEO problem” that cannot be delegated. Enrique Lores, President and Chief Executive Officer of HP, urged balance in AI usage, with restraint in being more demanding of AI co-workers than of human employees. In HP’s call centres, AI sometimes gives the wrong answer; yet overall accuracy is higher than before, and customer satisfaction has improved, he added.

The Beginner’s Guide to Computer Vision with Python
In this article, you will learn how to complete three beginner-friendly computer vision tasks in Python — edge detection, simple object detection, and image classification — using widely available libraries. Topics we will cover include: Installing and setting up the required Python libraries. Detecting edges and faces with classic OpenCV tools. Training a compact convolutional neural network for image classification. Let’s explore these techniques. The Beginner’s Guide to Computer Vision with PythonImage by Editor Introduction Computer vision is an area of artificial intelligence that gives computer systems the ability to analyze, interpret, and understand visual data, namely images and videos. It encompasses everything from classical tasks like image filtering, edge detection, and feature extraction, to more advanced tasks such as image and video classification and complex object detection, which require building machine learning and deep learning models. Thankfully, Python libraries like OpenCV and TensorFlow make it possible — even for beginners — to create and experiment with their own computer vision solutions using just a few lines of code. This article is designed to guide beginners interested in computer vision through the implementation of three fundamental computer vision tasks: Image processing for edge detection Simple object detection, like faces Image classification For each task, we provide a minimal working example in Python that uses freely available or built-in data, accompanied by the necessary explanations. You can reliably run this code in a notebook-friendly environment such as Google Colab, or locally in your own IDE. Setup and Preparation An important prerequisite for using the code provided in this article is to install several Python libraries. If you run the code in a notebook, paste this command into an initial cell (use the prefix “!” in notebooks): pip install opencv-python tensorflow scikit-image matplotlib numpy pip install opencv–python tensorflow scikit–image matplotlib numpy Image Processing With OpenCV OpenCV is a Python library that offers a range of tools for efficiently building computer vision applications—from basic image transformations to simple object detection tasks. It is characterized by its speed and broad range of functionalities. One of the primary task areas supported by OpenCV is image processing, which focuses on applying transformations to images, generally with two goals: improving their quality or extracting useful information. Examples include converting color images to grayscale, detecting edges, smoothing to reduce noise, and thresholding to separate specific regions (e.g. foreground from background). The first example in this guide uses a built-in sample image provided by the scikit-image library to detect edges in the grayscale version of an originally full-color image. from skimage import data import cv2 import matplotlib.pyplot as plt # Load a sample RGB image (astronaut) from scikit-image image = data.astronaut() # Convert RGB (scikit-image) to BGR (OpenCV convention), then to grayscale image = cv2.cvtColor(image, cv2.COLOR_RGB2BGR) gray = cv2.cvtColor(image, cv2.COLOR_BGR2GRAY) # Canny edge detection edges = cv2.Canny(gray, 100, 200) # Display plt.figure(figsize=(10, 4)) plt.subplot(1, 2, 1) plt.imshow(gray, cmap=”gray”) plt.title(“Grayscale Image”) plt.axis(“off”) plt.subplot(1, 2, 2) plt.imshow(edges, cmap=”gray”) plt.title(“Edge Detection”) plt.axis(“off”) plt.show() 1 2 3 4 5 6 7 8 9 10 11 12 13 14 15 16 17 18 19 20 21 22 23 24 25 26 27 28 from skimage import data import cv2 import matplotlib.pyplot as plt # Load a sample RGB image (astronaut) from scikit-image image = data.astronaut() # Convert RGB (scikit-image) to BGR (OpenCV convention), then to grayscale image = cv2.cvtColor(image, cv2.COLOR_RGB2BGR) gray = cv2.cvtColor(image, cv2.COLOR_BGR2GRAY) # Canny edge detection edges = cv2.Canny(gray, 100, 200) # Display plt.figure(figsize=(10, 4)) plt.subplot(1, 2, 1) plt.imshow(gray, cmap=“gray”) plt.title(“Grayscale Image”) plt.axis(“off”) plt.subplot(1, 2, 2) plt.imshow(edges, cmap=“gray”) plt.title(“Edge Detection”) plt.axis(“off”) plt.show() The process applied in the code above is simple, yet it illustrates a very common image processing scenario: Load and preprocess an image for analysis: convert the RGB image to OpenCV’s BGR convention and then to grayscale for further processing. Functions like COLOR_RGB2BGR and COLOR_BGR2GRAY make this straightforward. Use the built-in Canny edge detection algorithm to identify edges in the image. Plot the results: the grayscale image used for edge detection and the resulting edge map. The results are shown below: Edge detection with OpenCV Object Detection With OpenCV Time to go beyond classic pixel-level processing and identify higher-level objects within an image. OpenCV makes this possible with pre-trained models like Haar cascades, which can be applied to many real-world images and work well for simple detection use cases, e.g. detecting human faces. The code below uses the same astronaut image as in the previous section, converts it to grayscale, and applies a Haar cascade trained for identifying frontal faces. The cascade’s metadata is contained in haarcascade_frontalface_default.xml. from skimage import data import cv2 import matplotlib.pyplot as plt # Load the sample image and convert to BGR (OpenCV convention) image = data.astronaut() image = cv2.cvtColor(image, cv2.COLOR_RGB2BGR) # Haar cascade is an OpenCV classifier trained for detecting faces face_cascade = cv2.CascadeClassifier( cv2.data.haarcascades + “haarcascade_frontalface_default.xml” ) # The model requires grayscale images gray = cv2.cvtColor(image, cv2.COLOR_BGR2GRAY) # Detect faces faces = face_cascade.detectMultiScale( gray, scaleFactor=1.1, minNeighbors=5 ) # Draw bounding boxes output = image.copy() for (x, y, w, h) in faces: cv2.rectangle(output, (x, y), (x + w, y + h), (0, 255, 0), 2) # Display plt.imshow(cv2.cvtColor(output, cv2.COLOR_BGR2RGB)) plt.title(“Face Detection”) plt.axis(“off”) plt.show() 1 2 3 4 5 6 7 8 9 10 11 12 13 14 15 16 17 18 19 20 21 22 23 24 25 26 27 28 29 30 31 from skimage import data import cv2 import matplotlib.pyplot as plt # Load the sample image and convert to BGR (OpenCV convention) image = data.astronaut() image = cv2.cvtColor(image, cv2.COLOR_RGB2BGR) # Haar cascade is an OpenCV classifier trained for detecting faces face_cascade = cv2.CascadeClassifier( cv2.data.haarcascades + “haarcascade_frontalface_default.xml” ) # The model requires grayscale images gray = cv2.cvtColor(image, cv2.COLOR_BGR2GRAY) # Detect faces faces = face_cascade.detectMultiScale( gray, scaleFactor=1.1, minNeighbors=5 ) # Draw bounding boxes output = image.copy() for (x, y, w, h) in faces: cv2.rectangle(output, (x, y), (x +

OnePlus To Be Dismantled? What It Means For Existing Users As India CEO Breaks Silence And Says… | Technology News
OnePlus Dismantled In India: Chinese smartphone brand OnePlus appears to be entering an uncertain phase. Once known for disrupting the market with bold launches and strong fan-driven buzz, the brand has recently found itself at the centre of reports claiming it is being “dismantled” by parent company Oppo. However, the company has strongly refuted these claims. Responding to a report by Android Headlines, OnePlus India CEO Robin Liu said the reports are false and misleading. He clarified that the company is not shutting down and that its operations in India continue as usual. Liu also stressed that there are no plans by the parent group to wind down the OnePlus brand. The claims originated from Android Headlines, which stated that OnePlus is being “wound down and put on life support”. The publication said its conclusions are based on an investigation spanning three continents, along with market data from four independent analyst firms. Add Zee News as a Preferred Source Official statement from OnePlus pic.twitter.com/I0Ii0SOUUo — OnePlus Club (@OnePlusClub) January 21, 2026 According to the report, OnePlus may not disappear overnight. Instead, it could gradually lose its distinct identity, following a path similar to brands such as BlackBerry, Micromax, Nokia, HTC and LG, which slowly faded from relevance. OnePlus’s Strategic Shift Since 2021 This is not the first major shift for OnePlus. In 2021, the company merged parts of its design and research teams with Oppo as part of a broader restructuring. Since then, OnePlus has steadily moved away from its original positioning as a disruptive “flagship killer” that once challenged Samsung Galaxy and Apple iPhone devices. At the time, the company said the move would help it share resources, accelerate product development and continue operating as an independent brand. OnePlus Shipments Fall Sharply in 2024 Recent market data suggests growing pressure. In 2024, OnePlus shipments fell by more than 20 percent, dropping from around 17 million units to 13–14 million. In India, its market share declined from 6.1 percent to 3.9 percent, while in China it slipped from 2 percent to 1.6 percent. (Also Read: iQOO 15R Confirmed To Launch In India, Could Feature 7,600mAh Battery; Check Expected Display, Chipset, Camera, And Other Specs) During the same period, Oppo recorded a 2.8 percent increase. According to Omdia analysts, this growth was driven entirely by Oppo, with key areas such as product strategy, research and development, and market decisions becoming increasingly centralised under the parent brand. Importantly, the report does not suggest that OnePlus is shutting down or exiting key markets such as India. India accounts for more than half of OnePlus’s annual sales, and the brand continues to remain active despite a shrinking market share. Is OnePlus Undergoing Internal Restructuring? In fact, OnePlus recently hosted a high-profile launch event in India for the OnePlus 15R and Pad Go 2, backed by significant marketing spend. The company has also signed several celebrity partnerships, including cricketers Jasprit Bumrah and Smriti Mandhana, racing driver Kush Maini and singer Armaan Malik. Taken together, the developments point to internal restructuring and closer alignment with Oppo as part of a broader global reset. For now, these changes do not appear to be slowing OnePlus’s push in markets like India. (Also Read: Vivo X200T India Launch Date Officially Confirmed For Jan 27; Check Expected Camera, Display, Battery, Chipset, Price And Other Specs) What It Means For Existing OnePlus Users For existing users, there is little cause for concern. OnePlus continues to roll out new products, with more devices reportedly in the pipeline. This indicates that inventory, spare parts and after-sales support will remain available. Warranties are expected to stay valid, and users can continue to expect regular Android updates and security patches in the near future.

AI Impact Summit 2026: India Highlights Three Key Objectives At Davos; IT Minister Meets Google Cloud CEO-Details | Technology News
AI Impact Summit 2026 In India: As India prepares to host the AI Impact Summit in New Delhi next month, the spotlight is firmly on the country’s growing role on the global technology stage. Union Minister Ashwini Vaishnaw, speaking at Davos, emphasised that the summit is built around three clear goals, reflecting India’s steady rise as a trusted global partner, driven by its push for sovereign AI models, robust safety frameworks, and a rapidly strengthening semiconductor ecosystem. Key Objectives Of Upcoming AI Impact Summit The AI Impact Summit has been designed around three clear goals. The first is impact, focusing on how AI models, applications, and the wider AI ecosystem can boost efficiency, raise productivity, and create broader benefits for the economy. The second goal is accessibility, with a special focus on making AI more affordable and usable for India and the Global South. Add Zee News as a Preferred Source Referring to India’s success with UPI and the Digital Public Infrastructure stack, Union Minister Ashwini Vaishnaw said the world is now watching to see if India can build a similar, scalable, and cost-effective framework for AI. The third goal is safety. He stressed the importance of addressing concerns around AI by creating strong guardrails, clear guidelines, and built-in safety features. Vaishnaw added that India should also develop its own regulatory and safety framework for AI. The AI Impact Summit, scheduled for next month, will bring together global policymakers and technology leaders, and is expected to feature major investment announcements along with the launch of India’s AI models. India Crosses 2 Lakh Startups India is now home to nearly 2 lakh startups and ranks among the top three startup ecosystems in the world. Union Minister Ashwini Vaishnaw said that 24 Indian startups are currently working on chip design, one of the toughest areas for new companies. Of these, 18 have already secured venture capital funding, reflecting strong investor confidence in India’s deep-tech potential. The minister also shared details of India’s semiconductor strategy. He pointed out that around 75 per cent of global chip demand falls in the 28nm to 90nm range, which is used in sectors such as electric vehicles, automobiles, railways, defence, telecom equipment, and a large portion of consumer electronics. Ashwini Vaishnaw said India is aiming to build strong manufacturing capabilities in this segment first before moving to more advanced technologies. In collaboration with industry partners like IBM, India has a clear roadmap to progress from 28nm to 7nm chips by 2030, and further to 3nm by 2032. IT Minister Ashwini Vaishnaw Meets Google Cloud CEO Ashwini Vaishnaw also met Google Cloud CEO Thomas Kurian in Davos, where Google reaffirmed its growing commitment to India’s AI ecosystem. This includes plans for a $15 billion AI data centre in Vizag, Andhra Pradesh, along with expanded partnerships with Indian startups. During his visit, Vaishnaw also met Meta’s Chief Global Affairs Officer, Joel Kaplan, and discussed measures to ensure the safety of social media users, particularly in addressing the risks posed by deepfakes and AI-generated content. (With IANS Inputs)
The Machine Learning Practitioner’s Guide to Model Deployment with FastAPI
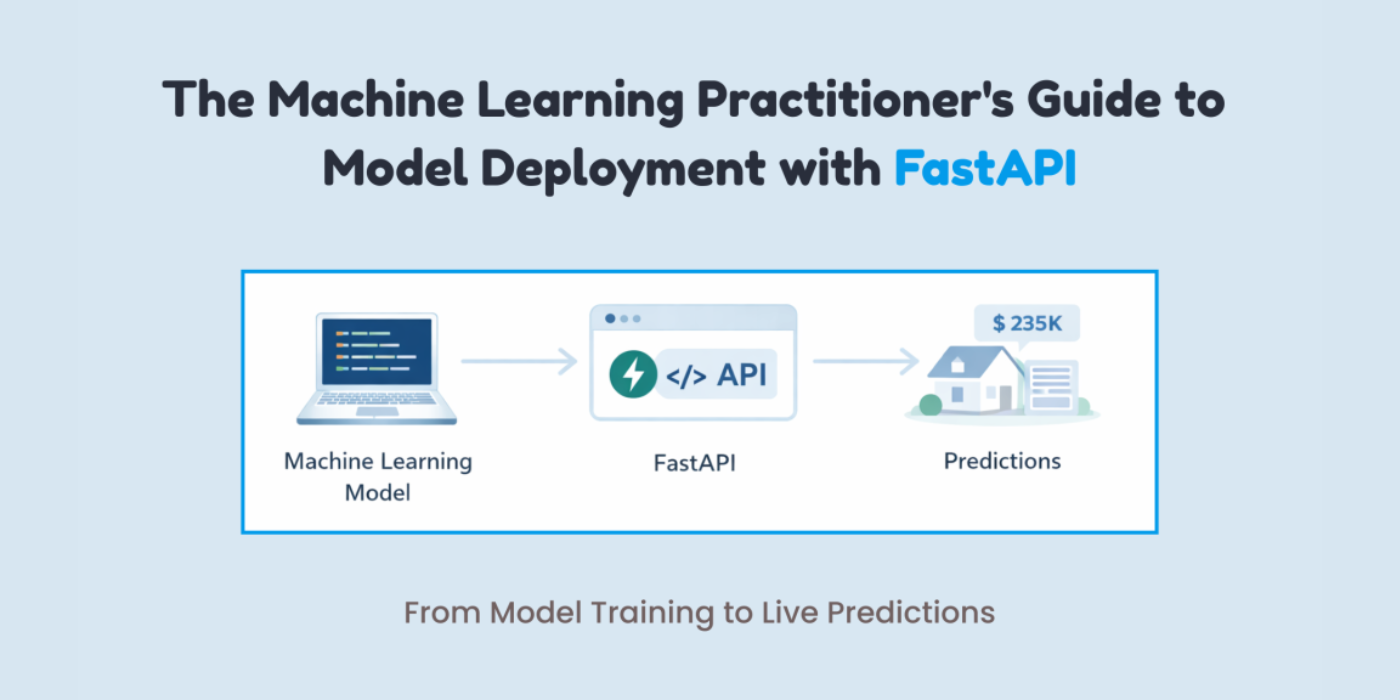
In this article, you will learn how to package a trained machine learning model behind a clean, well-validated HTTP API using FastAPI, from training to local testing and basic production hardening. Topics we will cover include: Training, saving, and loading a scikit-learn pipeline for inference Building a FastAPI app with strict input validation via Pydantic Exposing, testing, and hardening a prediction endpoint with health checks Let’s explore these techniques. The Machine Learning Practitioner’s Guide to Model Deployment with FastAPIImage by Author If you’ve trained a machine learning model, a common question comes up: “How do we actually use it?” This is where many machine learning practitioners get stuck. Not because deployment is hard, but because it is often explained poorly. Deployment is not about uploading a .pkl file and hoping it works. It simply means allowing another system to send data to your model and get predictions back. The easiest way to do this is by putting your model behind an API. FastAPI makes this process simple. It connects machine learning and backend development in a clean way. It is fast, provides automatic API documentation with Swagger UI, validates input data for you, and keeps the code easy to read and maintain. If you already use Python, FastAPI feels natural to work with. In this article, you will learn how to deploy a machine learning model using FastAPI step by step. In particular, you will learn: How to train, save, and load a machine learning model How to build a FastAPI app and define valid inputs How to create and test a prediction endpoint locally How to add basic production features like health checks and dependencies Let’s get started! Step 1: Training & Saving the Model The first step is to train your machine learning model. I am training a model to learn how different house features influence the final price. You can use any model. Create a file called train_model.py: import pandas as pd from sklearn.linear_model import LinearRegression from sklearn.pipeline import Pipeline from sklearn.preprocessing import StandardScaler import joblib # Sample training data data = pd.DataFrame({ “rooms”: [2, 3, 4, 5, 3, 4], “age”: [20, 15, 10, 5, 12, 7], “distance”: [10, 8, 5, 3, 6, 4], “price”: [100, 150, 200, 280, 180, 250] }) X = data[[“rooms”, “age”, “distance”]] y = data[“price”] # Pipeline = preprocessing + model pipeline = Pipeline([ (“scaler”, StandardScaler()), (“model”, LinearRegression()) ]) pipeline.fit(X, y) 1 2 3 4 5 6 7 8 9 10 11 12 13 14 15 16 17 18 19 20 21 22 23 24 import pandas as pd from sklearn.linear_model import LinearRegression from sklearn.pipeline import Pipeline from sklearn.preprocessing import StandardScaler import joblib # Sample training data data = pd.DataFrame({ “rooms”: [2, 3, 4, 5, 3, 4], “age”: [20, 15, 10, 5, 12, 7], “distance”: [10, 8, 5, 3, 6, 4], “price”: [100, 150, 200, 280, 180, 250] }) X = data[[“rooms”, “age”, “distance”]] y = data[“price”] # Pipeline = preprocessing + model pipeline = Pipeline([ (“scaler”, StandardScaler()), (“model”, LinearRegression()) ]) pipeline.fit(X, y) After training, you have to save the model. # Save the entire pipeline joblib.dump(pipeline, “house_price_model.joblib”) # Save the entire pipeline joblib.dump(pipeline, “house_price_model.joblib”) Now, run the following line in the terminal: You now have a trained model plus preprocessing pipeline, safely stored. Step 2: Creating a FastAPI App This is easier than you think. Create a file called main.py: from fastapi import FastAPI from pydantic import BaseModel import joblib app = FastAPI(title=”House Price Prediction API”) # Load model once at startup model = joblib.load(“house_price_model.joblib”) from fastapi import FastAPI from pydantic import BaseModel import joblib app = FastAPI(title=“House Price Prediction API”) # Load model once at startup model = joblib.load(“house_price_model.joblib”) Your model is now: Loaded once Kept in memory Ready to serve predictions This is already better than most beginner deployments. Step 3: Defining What Input Your Model Expects This is where many deployments break. Your model does not accept “JSON.” It accepts numbers in a specific structure. FastAPI uses Pydantic to enforce this cleanly. You might be wondering what Pydantic is: Pydantic is a data validation library that FastAPI uses to make sure the input your API receives matches exactly what your model expects. It automatically checks data types, required fields, and formats before the request ever reaches your model. class HouseInput(BaseModel): rooms: int age: float distance: float class HouseInput(BaseModel): rooms: int age: float distance: float This does two things for you: Validates incoming data Documents your API automatically This ensures no more “why is my model crashing?” surprises. Step 4: Creating the Prediction Endpoint Now you have to make your model usable by creating a prediction endpoint. @app.post(“/predict”) def predict_price(data: HouseInput): features = [[ data.rooms, data.age, data.distance ]] prediction = model.predict(features) return { “predicted_price”: round(prediction[0], 2) } @app.post(“/predict”) def predict_price(data: HouseInput): features = [[ data.rooms, data.age, data.distance ]] prediction = model.predict(features) return { “predicted_price”: round(prediction[0], 2) } That’s your deployed model. You can now send a POST request and get predictions back. Step 5: Running Your API Locally Run this command in your terminal: uvicorn main:app –reload uvicorn main:app —reload Open your browser and go to: http://127.0.0.1:8000/docs http://127.0.0.1:8000/docs You’ll see: If you are confused about what it means, you are basically seeing: Interactive API docs A form to test your model Real-time validation Step 6: Testing with Real Input To test it out, click on the following arrow: After this, click on Try it out. Now test it with some data. I am using the following values: { “rooms”: 4, “age”: 8, “distance”: 5 } { “rooms”: 4, “age”: 8, “distance”: 5 } Now, click on Execute to get the response. The response is: { “predicted_price”: 246.67 } { “predicted_price”: 246.67 } Your model is now accepting real data, returning predictions, and ready to integrate with apps, websites, or other services. Step 7: Adding a Health Check You don’t need Kubernetes on day one, but do consider: Error handling (bad input

AI Must Be Multilingual, Voice-Enabled To Ensure Better Healthcare Services: Officials | Technology News
New Delhi: For artificial intelligence (AI) to deliver meaningful public value in a linguistically diverse country like India, it must be multilingual and voice-enabled, ensuring that language does not become a barrier to accessing healthcare services, according to Amitabh Nag, CEO, Digital India BHASHINI Division (DIBD). Nag said that language AI can significantly enhance citizen engagement, grievance redressal mechanisms, clinical documentation, and the overall accessibility of digital public health platforms. He participated at an event by DIBD in Bhubaneswar which brought together senior officials from the Union and state governments, technical institutions, and implementing agencies to review progress and accelerate the adoption of digital health initiatives across the country. Nag highlighted that as digital health systems scale across the country, the adoption of artificial intelligence becomes a natural progression. Add Zee News as a Preferred Source A key highlight was the signing of an MoU between the National Health Authority and the Digital India BHASHINI Division to enable multilingual translation services and AI-powered language support across NHA’s digital health platforms, including AB PM-JAY and ABDM. Kiran Gopal Vaska, Joint Secretary, Ayushman Bharat Digital Mission (ABDM), highlighted the practical benefits of language AI in healthcare delivery. He noted that AI-enabled tools such as voice-to-text and natural language processing can help address the time constraints faced by doctors by enabling seamless patient–doctor interactions, while allowing electronic health records to be created automatically, thereby improving efficiency and strengthening digital health systems. The Digital India BHASHINI Division will support the National Health Authority in deploying multilingual and voice-enabled solutions across beneficiary-facing and administrative platforms, with provisions for responsible data governance, secure system integration, and continuous improvement of language models through real-world usage and feedback. The deliberations at the event were aligned with the national objective of advancing digital health through AI-driven innovation and inclusive language access, with a focus on ensuring that digital health platforms are usable, accessible, and effective across linguistic and geographic boundaries.